FREE SHIPPING ON ALL ORDERS · 1-YEAR FREE REPLACEMENT WARRANTY509-991-0385cs@dfna.info
Do It Yourself Dual Battery Isolator System
Home / Journal / Installing a Dual Battery System on a Honda Pioneer 1000 with True® Dual Battery Kit
Customer Videos · 4 min read
Installing a Dual Battery System on a Honda Pioneer 1000 with True® Dual Battery Kit
November 8, 2024 by DFNA
Summary of the Project Setup for Auxiliary Battery and Electrical System Upgrade
Presenters: Rob Spari and Brendan Hillary Purpose: To clearly demonstrate how to wire and install a dual battery setup on Honda Pioneer 1000, addressing confusion left by other tutorials
The speaker walks through a detailed DIY project to install an auxiliary battery system with a power management setup, primarily for a Honda side-by-side (UTV/ATV).
Components Used:
Auxiliary Battery: Chose a Mighty Max battery ($54) over more expensive options like the Odyssey Extreme ($185).
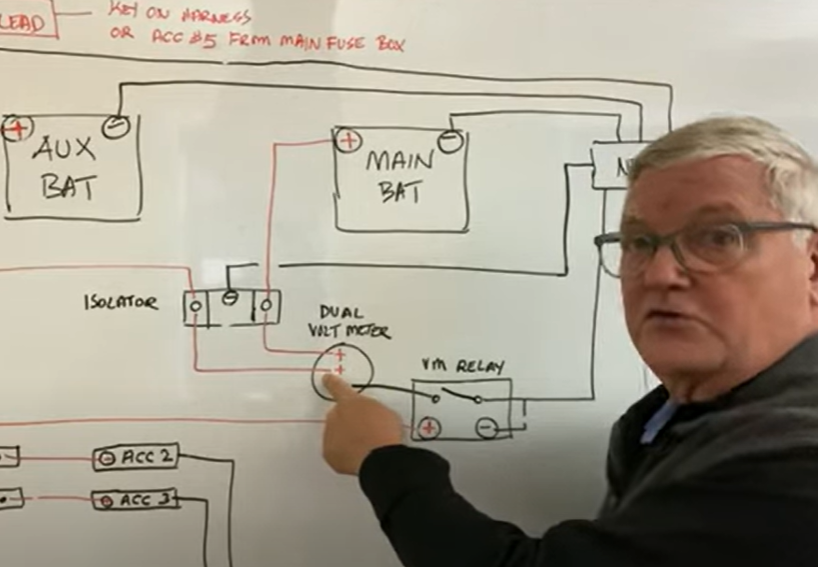
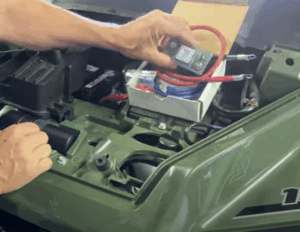
Original True® UTV battery Isolator kit complete with cables, screws, and dual voltage meter: Purchased from a Honda side-by-side store. Included a dual voltage meter (accidentally bought a second one separately).
Key-On Power Harness: Initially tried a plug-and-play adapter to tap into the cigarette lighter but couldn’t access it. Used a fuse tap (Busman mini fuse adapter) on the accessory fuse instead.
Fuse Box: Chose a 10-circuit version with blown-fuse indicator lights. In hindsight, a smaller 6-circuit narrow version would have been better for easier mounting.
Bus Bars (Positive & Negative): Installed both to simplify wiring and avoid reconnecting directly to battery terminals.
Miscellaneous Supplies:
Red heat shrink, red electrical tape for color coding.
Extra battery leads and loop/spade connectors for various wire gauges.
3/8” flex tubing for wire protection.
Green Guard insulation board ($5 from Lowe’s) used as a fuse box mounting base.
M6x20mm bolts for the battery posts.
Klein Tools wire stripper and a heat gun for clean wiring and shrink tubing.
Wiring and Installation Notes:
Battery Tender (Trickle Charger):
Added a connector for easy charging access.
Routed safely away from hot engine components.
Zip-tied out through the front grille with a weatherproof cap.
Switch Plate:
From PBR Products; mounted using screws (not rivets) for future serviceability.
Used a DeWalt multi-tool to cut a rectangle into the panel for mounting switches.

 Battery Tender (Trickle Charger):
 Testing and Final Setup